Blog

A Little Pecard Keeps the Dryness Away

August 1, 2014

Leather is an organic material. Just like our own skin, we need to take care of it. Composed of fibers, it can be very strong and durable. However, for it to work properly, there needs to be a sheath of oil that surrounds each fiber. As long as the animal can produce oil, the fibers remain supple and strong.


Once the skin is removed, the natural oils cannot, of course, be replaced. The remaining oil will disappear over time, and the fibers start to rub against each other. This is where leather damage begins. To top it off, environmental factors will accelerate the evaporation of the oils. Sunshine, dryness and excessive wear and tear will all dry the leather.


Thus it is important to replace the oils over time. We are partial to Pecard’s leather dressing. It is a proprietary formula, but one known ingredient is beeswax. This is a great lubricant for leather because it does not break down. Products like Neetsfoot Oil contain fats that break down and allow the fibers to rub. But the fatty oils are also prone to bacteria and fungi, which will hurt the leather.


You don’t need to use much conditioner. For our whips, we recommend a coating every six months. Simply rub the conditioner over the leather and let it sit. The time will depend on the dryness of the leather. If you allow it to sit for several days, it will have time to seep deeply into the leather. When you are satisfied with the time, simply wipe the remainder away.


LEARN MORE ABOUT:


Pecard Leather Dressing

Whip Maintenance


How to Replace a Whip Fall

July 18, 2014

For some people, replacing a whip fall looks intimidating. We are happy to do it for you (See Whip Repair Services), but why not give it a try yourself? The instructions are below:

If a fall has broken to shorter than 12-18 inches, it needs replacing. If it has stretched, it should be replaced when it has become noticeably thinner than the end of the thong. Red hide falls tend more to hold their shape, but break off. White hide falls tend to stretch more but break off more slowly. The kangaroo strands adjacent to the fall may eventually break because of the sharp flexing at this point. The fall should be replaced as soon as the first of these strands breaks.


Fall Replacement Method 1 

If none of the braided strands adjacent to the fall are broken, the old fall may be removed without undoing the hitches.

To do this, attach the main body of the whip to a hook or some other secure anchor, then trim the end of the new fall to a point. Put the eye of the new fall over the old fall and the end of the thong. Grease the new fall with braiding soap or Pecard Leather Dressing.


Attach the main body of the whip to a hook or some other secure anchor, then trim the end of the new fall to a point, put the old fall and part of the thong through the eye of the new fall and grease the new fall with braiding soap or Pecard Leather Dressing


To remove the old fall, put a fid through the eye of the old fall (between the fall and the braid). Using a sharp knife, cut the fall against the fid, taking care not to cut the braid. Pull the old fall out of the hitches.

Feed the point of the new fall through the tunnel left by the old fall. Pull the new fall into place while holding the strand of the final hitch. Put this strand through the eye of the new fall as it is pulled into place. The result should appear as shown below. 

To remove the old fall put a fid through the eye of the old fall between the fall and the braid, and using a sharp knife cut the fall against the fid, taking care to avoid cutting the braid. Pull the old fall out of the hitches. Feed the point of the new fall through the tunnel under the hitches where the old fall was removed, and pull into place, holding the end of the last hitch so it may be put under the eye of the new fall as the latter is pulled up. The result should appear as shown here.


Fall Replacement Method 2

If the strands of the braid next to the fall are broken or badly worn, the hitches and part of the thong must be undone until the shortest strand of the loose ends is about four inches long.

Place the end of the thong through the eye of the new fall as shown below and grease the strands with braiding soap or Pecard Leather Dressing.  

Place the end of the thong through the eye of the new fall as shown to the right and grease the strands with braiding soap or Pecard Leather Dressing


With the top strand on the left, tie a half-hitch around the fall and the other strands in the direction shown and pull tight. (With short strands use pliers to pull the strands tight.)


With the strand on the left, tie a half-hitch around the fall and other strands in the direction shown and pull tight. With short strands use pliers to pull the strands tight.


  Move the remaining strands to the left, leaving any core strands against the fall. Fold the end of the first strand down and hold it against the fall. Taking a second strand pull it tight and tie a second half hitch in the same manner as the first.  

Move the remaining strands to the left, leaving any core strands against the fall, and fold the end of the first strand down and hold it against the fall. Taking a second strand pull it tight and tie a second half hitch in the same manner as the first.


Continue on with the remaining strands of the braid, but after the final strand is hitched, put the end of the strand up and under the eye of the fall.  

Continue on with the remaining strands of the braid, but after the last strand is hitched put the end of the strand up and under the eye of the fall.


Tighten all strands again in sequence from the first to the last, pull the fall securely into place, and then trim the ends of the strands to a uniform length.

Attach a cracker.

Lastly, roll the attachment between two hard surfaces to make it smooth.


Tighten all strands again in sequence from the first to the last, pull the fall securely into place, and then trim the ends of the strands to a uniform length. Lastly roll the attachment between two hard surfaces to make it smooth.

 LEARN MORE ABOUT:

Leather and Braiding Supplies

Attaching a Cracker


Packing Marks in a Hat

July 3, 2014

We prepare our hats so that they are protected during shipping, but sometimes the parcel can be improperly handled. When this occurs, our felt hats may receive packing marks. These will appear as white marks on the brim, next to the crown. It is very easy to fix this problem. Often a brush will remove the marks. If not, the next alternative is to use a light dusting of steam.

When steaming a hat, it’s best to use a tea kettle. The spout at the top of the kettle makes a perfect channel for the steam. In fact, most hat steamers are just glorified tea kettles. If you don’t have a tea kettle, a pot of boiling water will also work. Just make sure that you keep your hands clear of the hot steam!

Follow the simple instructions below, and you’ll have your hat free of packing marks in less than 30 seconds.

There is also a video on YouTube that you can watch

packingmarks

Packing marks (over exaggerated  

  steamer

A steamer. But a tea kettle works just as well

applyingsteam

Applying steam. Note the distance. Do not put the steam directly on the hat. 6-8 inches is a good distance

finished

The finished product. Total time, 15 seconds.


The Wildlife of David Morgan

June 20, 2014

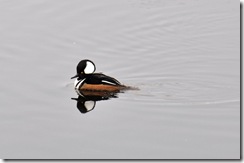
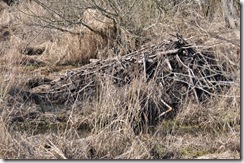
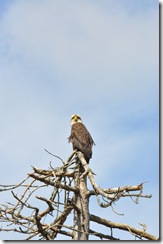
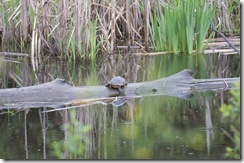
We are fortunate here at David Morgan to be located near a small river called, “North Creek.” For many years the Army Corps of Engineers and the local municipal governments and businesses have worked to improve the quality of the watershed. Not only has the salmon population returned, but many other species have taken up residence along the creek and the adjoining ponds. Below are just a few species.

If you ever drop by our store, take a few minutes to take a walk on the paths along the North Creek!


Hooded Merganser

Hooded Merganser


Beaver

Beaver


Bald Eagle

Bald Eagle


Painted Turtle

Painted Turtle


Introducing the Rancher’s Panama

June 6, 2014

Many have asked for a Panama with a higher crown, and we’re pleased to announce the Rancher’s Panama. Along with a high crown, it sports a cattleman’s crease. It also features our own kangaroo leather hat band, hand braided here at our facilities in Bothell, Washington.

There are three air vents on each side. The body is woven in Ecuador from toquilla fiber which is considered the best straw for Panama hats. 


Ranchers Panama

Rancher’s Panama


LEARN MORE ABOUT

 Panama Hats


An Akubra Visits Machu Picchu

May 22, 2014

Akubra is made for rugged terrain. It’s no surprise that we’ve received pictures of happy customers wearing their hats from all over the world. This is our first from Peru. Our Kiandra made it all the way to Machu Picchu.

We’d love to receive more photos of you with your Akubra. Or, if you’re a little shy, just send one of the hat, as in these photographs. We’ll post it here!


SouthAmerica-391

Is a spirit trying to wear the hat?


SouthAmerica-396

Close-up showing our very-own kangaroo leather chinstrap.


SouthAmerica-400

Posing against a majestic background.

LEARN MORE ABOUT:

Akubra Hats


Kangaroo Hide Color Changes

May 8, 2014

There have been a few times when our customers wondered why their new kangaroo leather goods were a light tan and not a dark brown. This is understandable when you see a photo of Indiana Jones with his dark brown whip

When we receive our kangaroo leather, it is a light tan. Almost immediately the color begins to darken. In the two photos below, the two whips are placed on top of a piece of kangaroo leather that we received a few months ago. You can see in the image how light the skin is.

Compare the skin with the two whips. The lighter whip in the photographs is approximately one year old. The darker whip is approximately ten years old. Both have remained indoors and have not been directly exposed to sunlight.


whipcomparison1

Close up of two whip handles, ages (left to right) one year and ten years.


whipcomparison2

Two whips, ages one and ten years.

We strongly recommend that you do not try to prematurely age your skin. This is a natural substance and excessive trauma on the skin will weaken it. We all know what happens to our skin when we expose it to intense sunlight and heat

LEARN MORE ABOUT:

Braided Leather Goods

Braiding and Leather Supplies


Cavin Richie – Profiles in Craftsmanship

April 18, 2014

Cavin Richie moved to the Puget Sound area in 1970 to be near the sea. For over thirty years his carvings have reflected his surroundings. All of his work is highly detailed. His line includes birds, mammals and amphibians. He begins the lost wax casting process using shed elk antler and woolly mammoth ivory. Cavin loves the earthy look of bronze and the way it shows the detail of his original designs.

“Carving,” says Cavin “is like touching antiquity. I feel a kinship with a long lineage of carvers dating back to the Pleistocene.”

Below are the steps that Cavin uses to create each of his remarkable pieces. The carving alone can take up to twenty hours. Each piece is a miniature sculpture.


cavin-carving-process-1

Cavin begins by sketching the wildlife into the shed antler.


cavin-carving-process-2

The antler is smoothed.


cavin-carving-process-3

The wildlife is cut out of the antler.


cavin-carving-process-4

Details are added to the piece.


cavin-carving-process-5

A rubber mold is created that will be used for the wax model.


cavin-carving-process-6

A wax model is created. A second mold is created around the wax model.


cavin-carving-process-7

Liquid bronze is poured into the mold. When the bronze cools, the bronze piece is removed from the mold.


cavin-carving-process-8

The rough casting is chased, the findings are soldered on and the patina is applied.


Watch Cavin on our YouTube channel.


Profiles in Craftsmanship:


LEARN MORE ABOUT:

Wildlife in Bronze

More Cavin Jewelry for Birdlovers

April 4, 2014

Cavin Richie has a tremendous talent for capturing the essence of nature in his jewelry. His bird designs are exquisite. Below are just a few of our latest additions. More can be discovered here.


Kingfisher Pendant


Kingfisher Pendant with Cord

Also available as a pin.


Magpie Pendant


3-D Magpie Pendant with Cord


Snowy Owl Pendant


Snowy Owl Pin

Also available as a pendant.


LEARN MORE ABOUT:


Cavin Richie


The Beauty of Leather

March 21, 2014

Art Edison of Edison Leather Works purchases kangaroo leather from us. He graciously sent us several photographs of his work. Art considers his work a “serious hobby” and he is not set up for (or interested in getting) lots of orders. He likes making a few things and selling them on a limited basis.


From the photos you can see the craftsmanship of his work. Enjoy! (And don’t forget to check out his blog postings, they are very enlightening.)


While we sell Art kangaroo lace and skins, please note that not all of the photos below are fully made with kangaroo leather.


Wallets:


The wallets are all hand-stitched using traditional 2-needle saddle making stitching. The black one is a trifold and the colored ones are bifolds.


edison_wallets


edison_wallets2


edison_wallets3


Purses:

Like the wallets, the purse is all hand-stitched. The exterior is medium weight kangaroo, and it is fully lined with a very lightweight oak-tanned cowhide (Hermann Oak). The handle is kangaroo. There are several types of braids (flat, round, turk’s head). The round braid goes all around the gusset of the bag underneath and is doubled.


edison_purse


edison_purse2


Belts:

These are a few belts that Art made with our factory cut narrow lace. The black was as ordered and all the colors were dyed using Fiebings, either regular or professional oil. All of the colors require a fair amount of “elbow grease” to rub out the excess after they dry well. Art typically dyes them, lets them hang to dry for a few days, and then gives them a thorough coat of Pecard’s Leather Dressing. Then they sit for several days and when he’s ready to braid them he rubs them a lot with rags.


 edison_belt


LEARN MORE ABOUT:


Edison Leather Works


Braiding and Leather Supplies